Fix: Local Security Authority Protection Is Off on Windows 11
If Secure Boot is off, this issue might pop up
- LSA protection is a very important Windows process that helps to protect users' credentials as it keeps attackers off.
- Windows update errors can however toggle off this form of protection.
- The Windows built-in Security app can easily help you turn the feature back on.
One of the most important Windows processes that authenticate a user’s identity is the Local Security Authority (LSA) protection.
Some users turn the LSA off due to high CPU, but the PC becomes exposed to several threats. As requested by some of our readers, we have provided the methods to enable it.
Why is Local security authority protection off?
For one reason or the other, the LSA protection may wind up disabled and end up giving access to cyber criminals. Below are some of the reasons why local security authority protection is off:
- Faulty Windows updates – Corrupt Windows updates are one of the main issues that may disable this feature.
- Secure Boot is turned off – All the Secure Boot and UEFI-related configurations are reset if you disable Secure Boot. Turning off Secure Boot, in turn, disables the local security authority protection.
- Windows Policy has disabled LSA – The LSA protection policy may be disabled from the configuration. Tweaking the Computer Configuration in the local group policy editor (gpedit.msc) can help to turn it back on.
What happens if Local Security Authority protection is off?
As we outlined above, the LSA protection is there to protect your PC from threats and if the feature is off, your device is exposed.
Now that you know some of the factors responsible for disabling the local security authority protection, check out the solutions provided below to turn it back on.
What can I do if Local Security Protection is off?
Before proceeding to explore any of the advanced steps provided in this article, it is important to make some preliminary checks which may fix the issue quicker:
- Ensure that you are signed in as an administrator to enable the additional protection for Local Security Authority in Windows 11.
- Check your Windows Security app to enable LSA protection.
- Ensure that your CPU virtualization is turned on.
Having confirmed the above checks, and none of them permanently fixes the problem, you can work through any advanced solutions below.
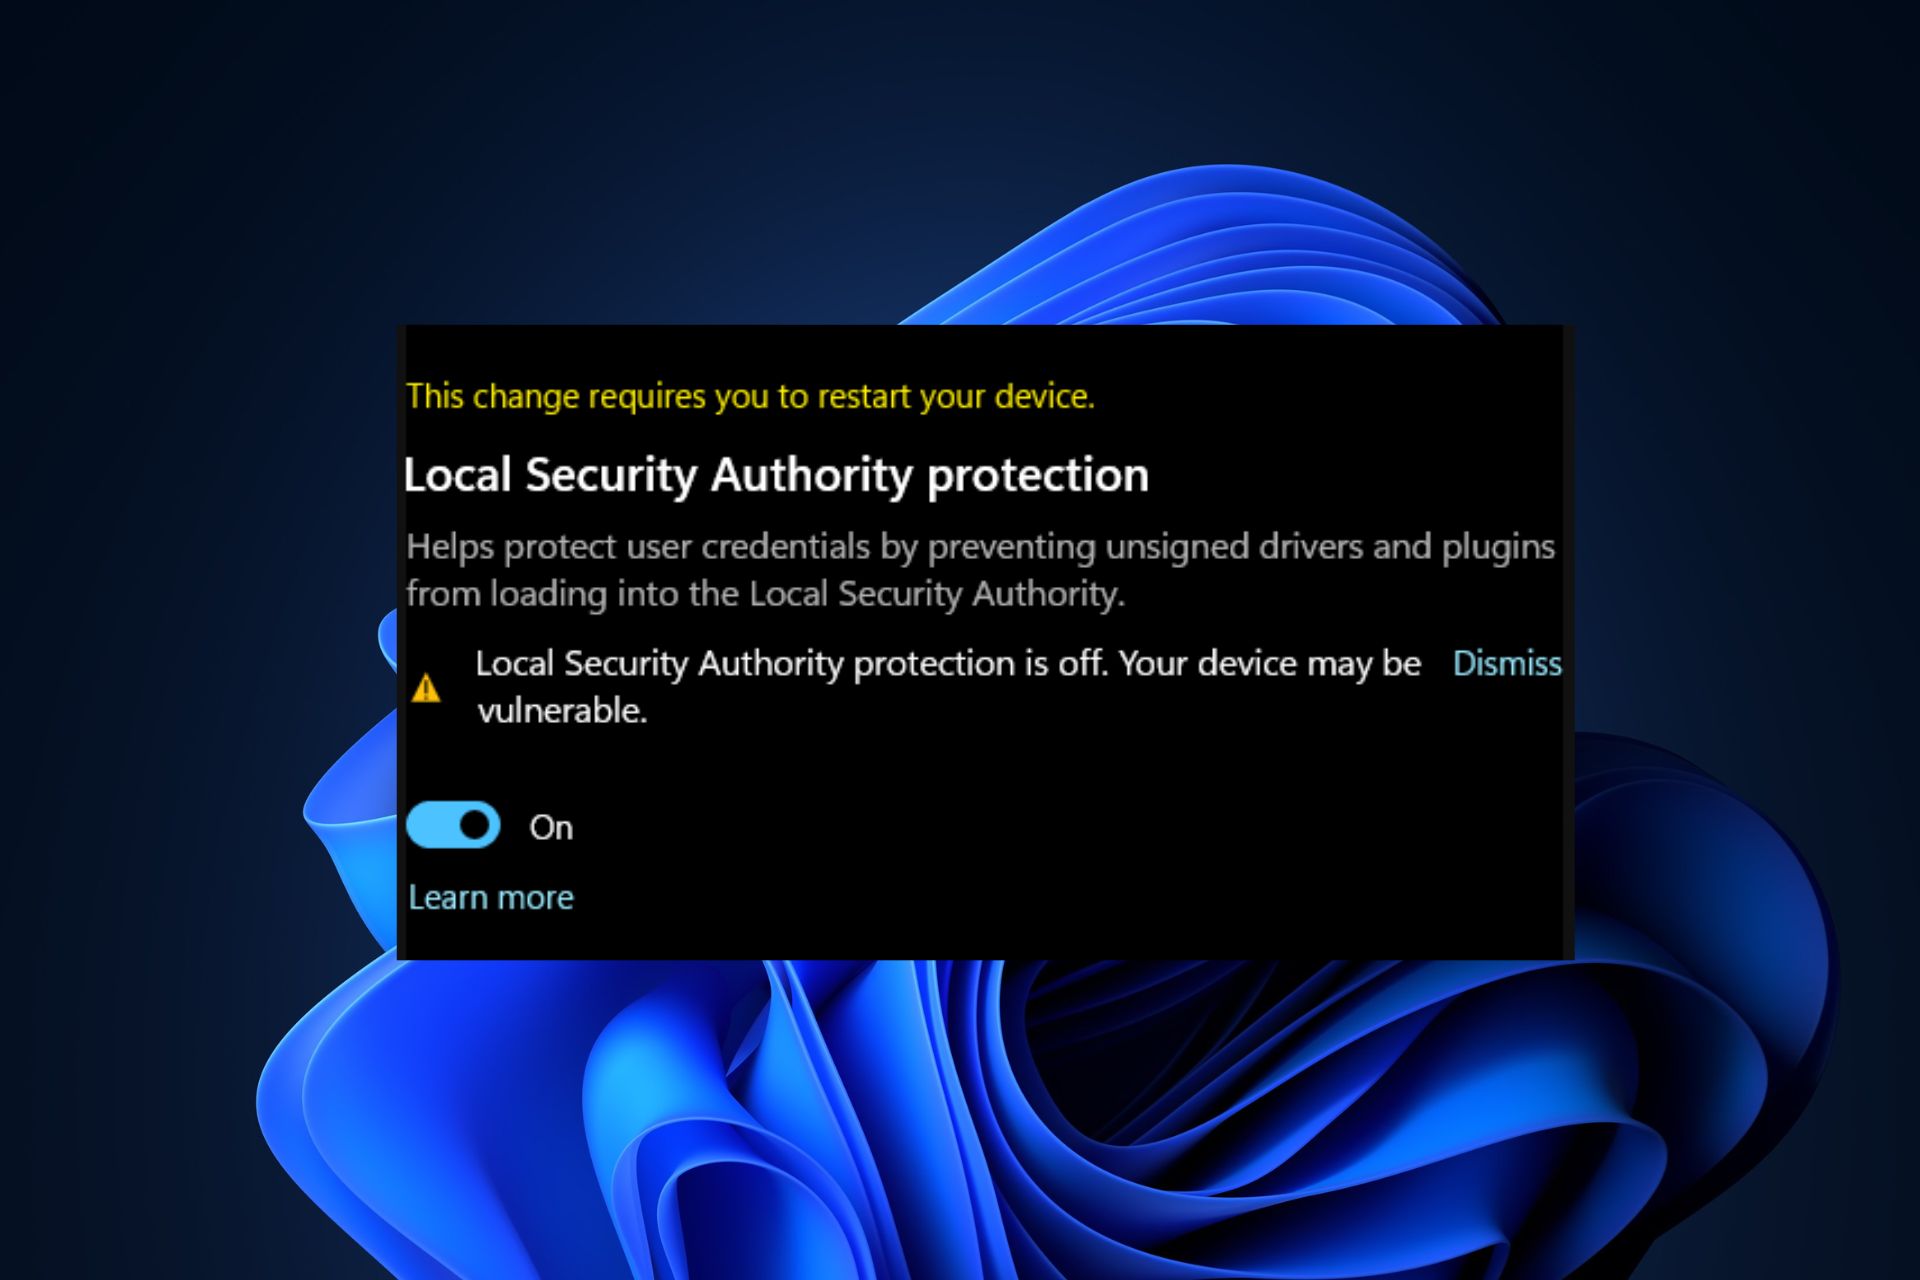
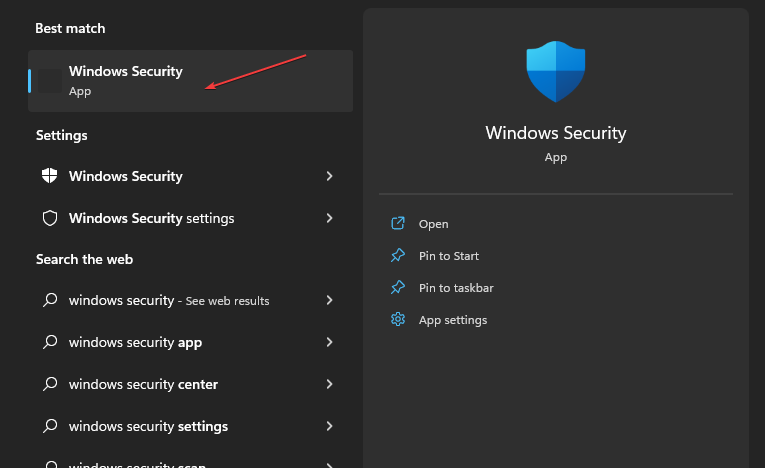
1. Use the Windows Security app
- Press the Windows key to open the Start Menu, type Windows Security in the search box, and press Enter.

- From the left pane, choose Device security. Under the Core isolation section, select the Core isolation details option.

- Enable the toggle under the Local Security Authority protection section.
- Then, click Yes in the UAC prompt that appears.
- Restart your PC to apply the changes.

Windows 11 Security is one of the ways you can prevent your system from cyber criminals. Below is another viable alternative if this does not work for you.
2. Use Registry Editor
- Press the Windows + R keys to open the Run dialog box. Type regedit in the dialog box and press Enter.
- In the Registry Editor, navigate to the following path:
Computer\HKEY_LOCAL_MACHINE\SYSTEM\CurrentControlSet\Control\Lsa
- Then, double-click on RunAsPPL in the right pane. Change the Value data to 1 (or 2 as some users claim this worked for them) and press Enter.
- Restart your PC to apply the changes.

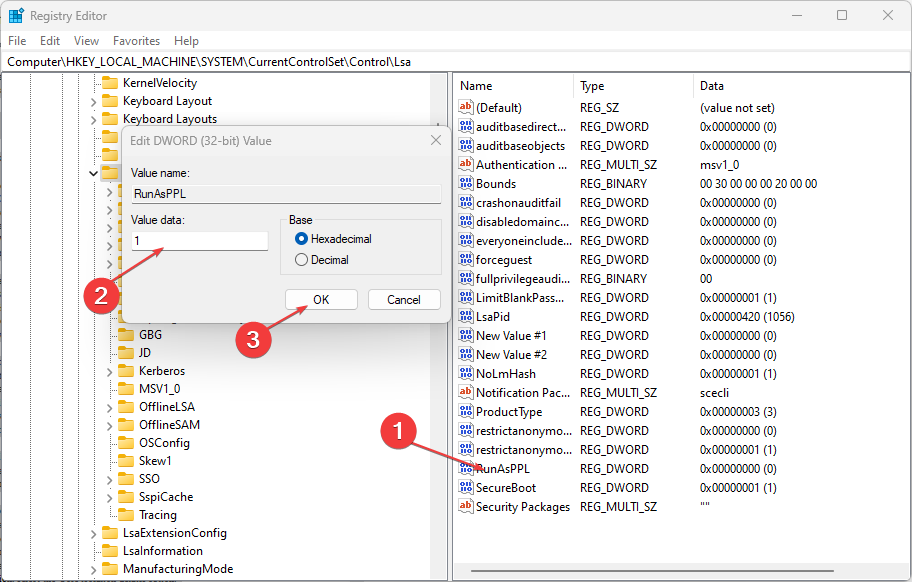
Before using the Registry Editor, make sure you back up your registry files or create a restore point to be safe in case it falls apart.
3. Via the Local Group Policy Editor
- Press the Windows + R keys to open the Run dialog box, type gpedit.msc, and press Enter.
- In the Local Group Policy Editor window, navigate to the following path:
Computer Configuration\Administrative Templates\System\Local Security Authority
- On the right pane of the window, right-click the Configure LSASS to run as a protected process.
- Next, click on Enable.
- Under Options, select Enabled with UEFI Lock, then click Apply and OK to save the changes.

- Restart your device.
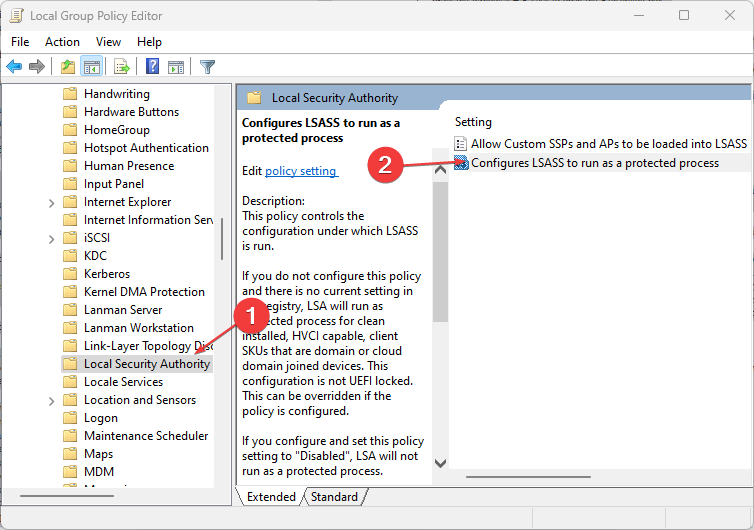

The Local Group Policy Editor is another option to enable local security authority protection. It is also important to create a system restore point before making any Windows Policy changes.
Some users also claim that signature verification could also be why LSA protection is off. So, if LSA is not signed as expected, you can explore this guide for further assistance.
And that’s how to re-enable Local Security Authority Protection if it is turned off. If you have any questions or suggestions, do not hesitate to use the comments section below.
Still having issues? Fix them with this tool:
SPONSORED
If the advices above haven't solved your issue, your PC may experience deeper Windows problems. We recommend downloading this PC Repair tool (rated Great on TrustPilot.com) to easily address them. After installation, simply click the Start Scan button and then press on Repair All.