Jusched.exe: What Is It & How to Properly Remove It
Disabling the Task Manager processes is a fast solution to remove it
- Jusched.exe is a legitimate process important for automatic Java updates on your computer.
- You may remove it from your computer, but it means that all future updates most be performed manually.
You’ve come here wondering what the jusched.exe is. Or perhaps you want to know if it is a dangerous virus or why it is running on my computer.
In this guide, we answer all the most important questions surrounding the executable process and show you how it may be easily removed from your computer.
What is jusched.exe?
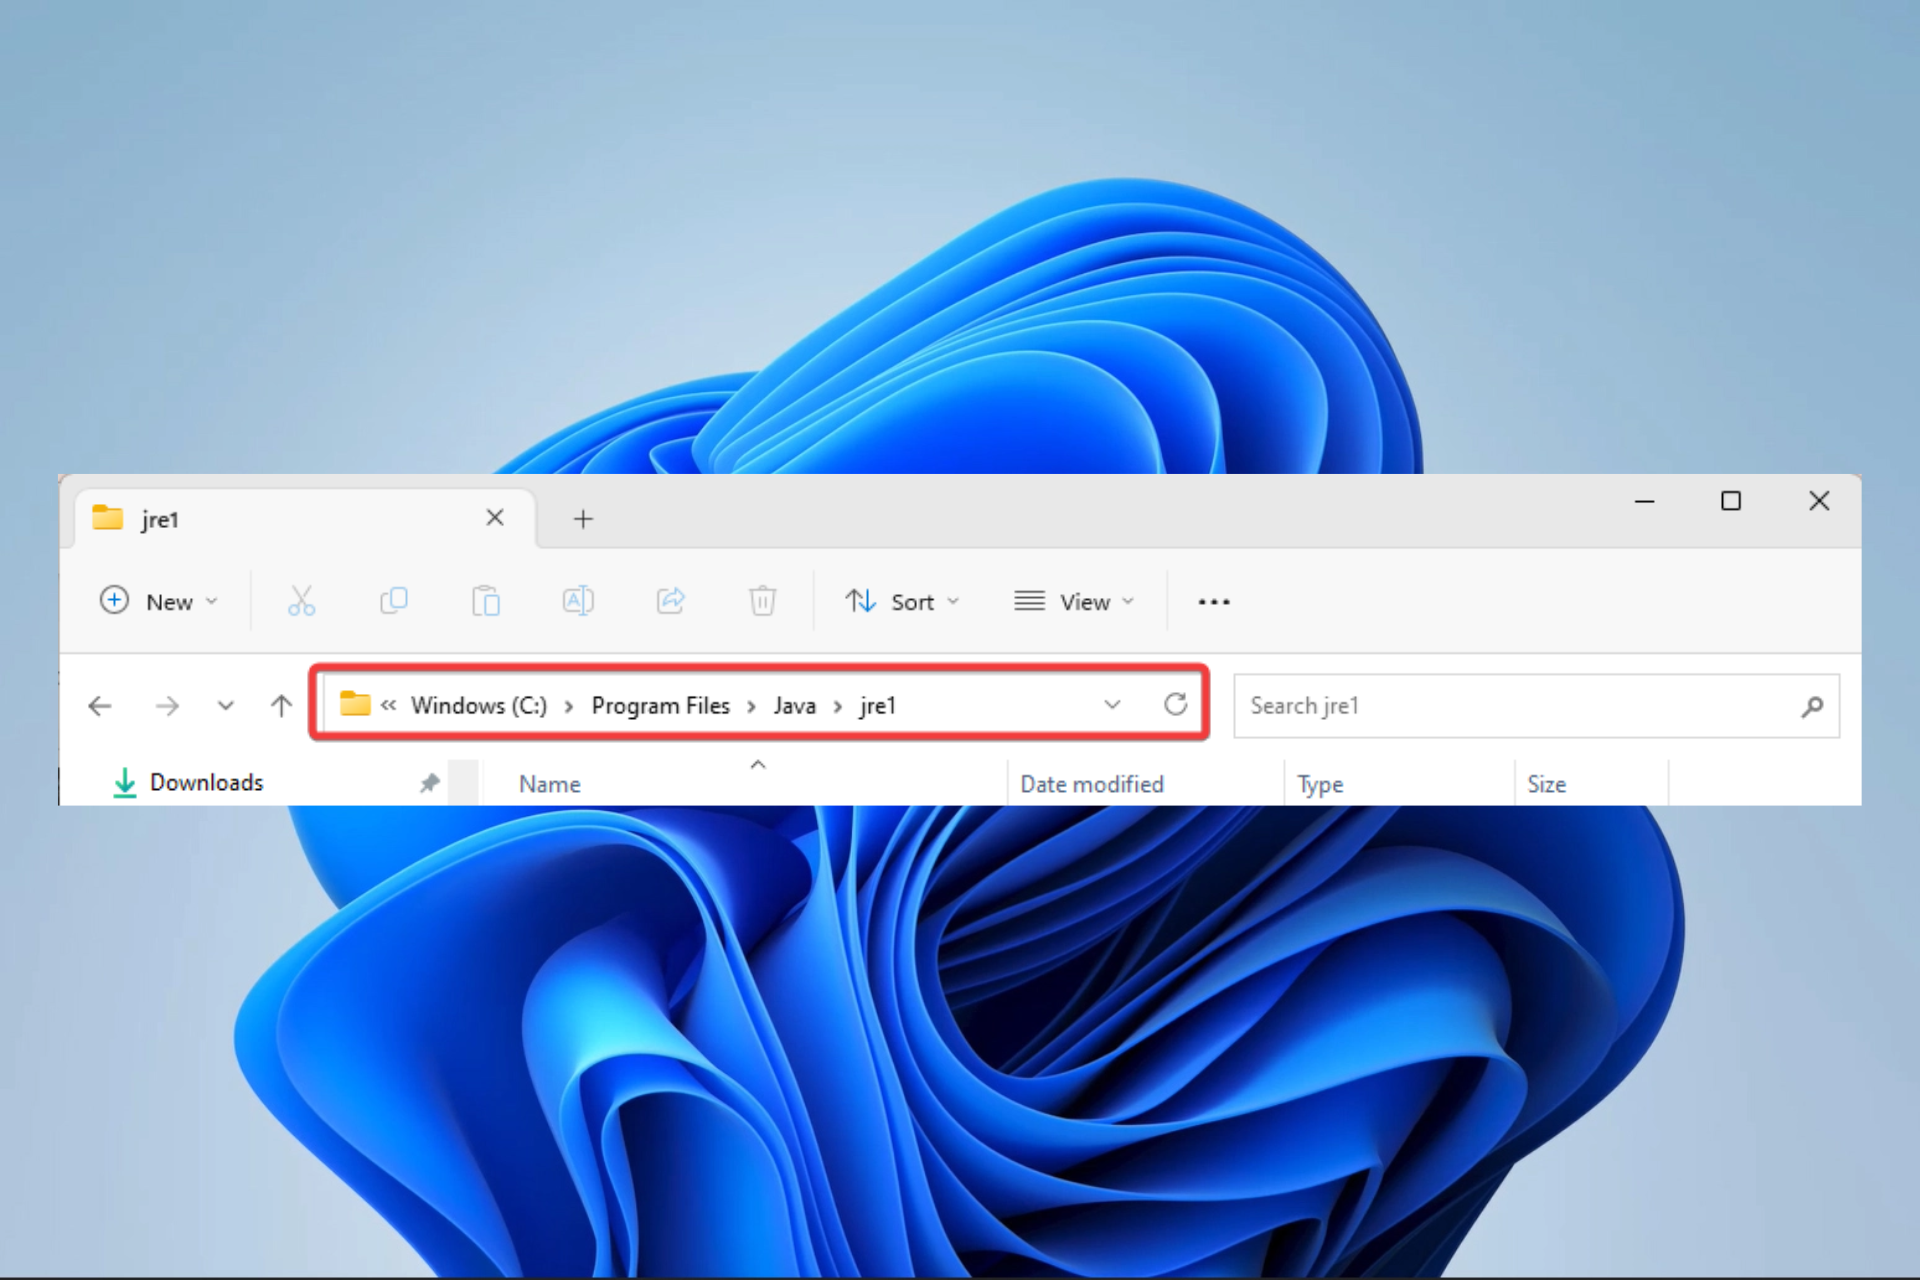
The Jusched.exe executable file is related to the Java Update Schedule. The process is legitimate and part of Oracle’s Java Runtime Environment (JRE), installed on systems with Java. The executable is located in the path below:
It runs in the background and is primarily designed for checking updates. When an update is found, it prompts you to install the latest version, ensuring you have the most secure and up-to-date version of Java.
Should I disable jusched.exe?
Users who don’t need Java or prefer to manage updates manually may disable jusched.exe. However, disabling jusched.exe does not impact the functioning of other software on your system, but it may mean you may miss some critical Java updates.
How do I remove jusched.exe?
1. End the Process
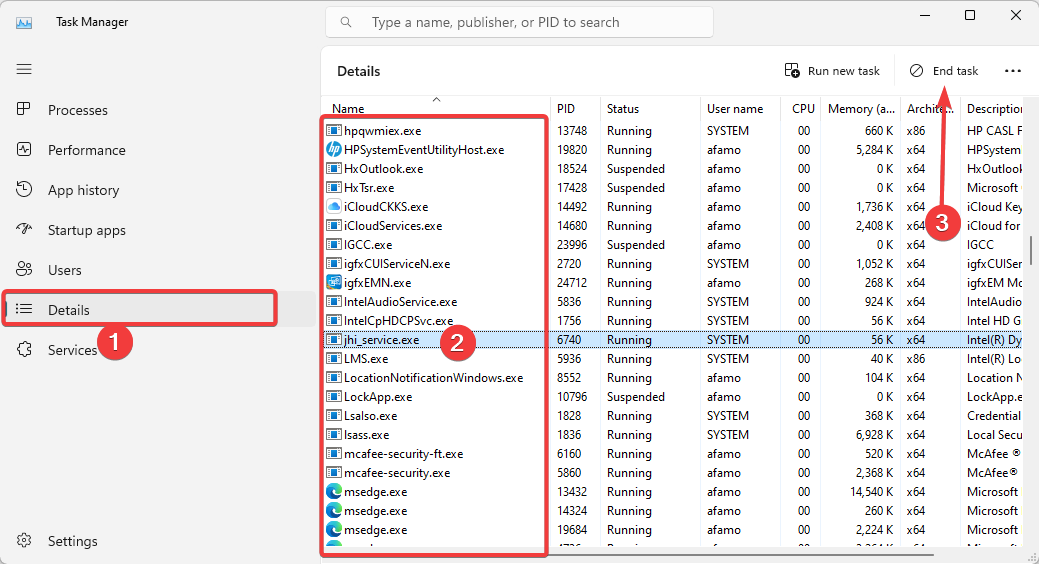
- Press Ctrl + Shift + Esc to open the Task Manager.
- Click on the Details tab, search for jusched.exe, click on it, and hit the End task button.
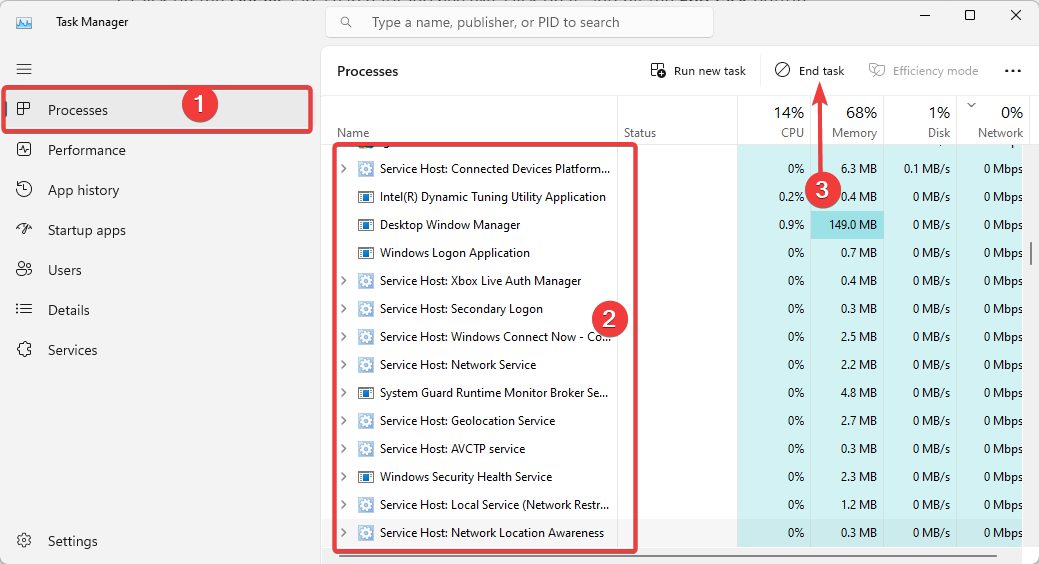
- Click on the Processes tab, search for any jusched.exe process, click on it, and hit the End task button.
This process will disable jusched.exe but not remove it from your computer. If you prefer to remove the Java Update Scheduler from your system completely, follow the next solution.
2. Uninstall from program and features
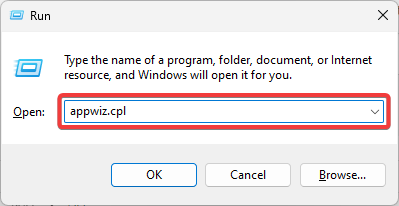
- Press Windows + R to open the Run dialog.
- Type appwiz.cpl and hit Enter.
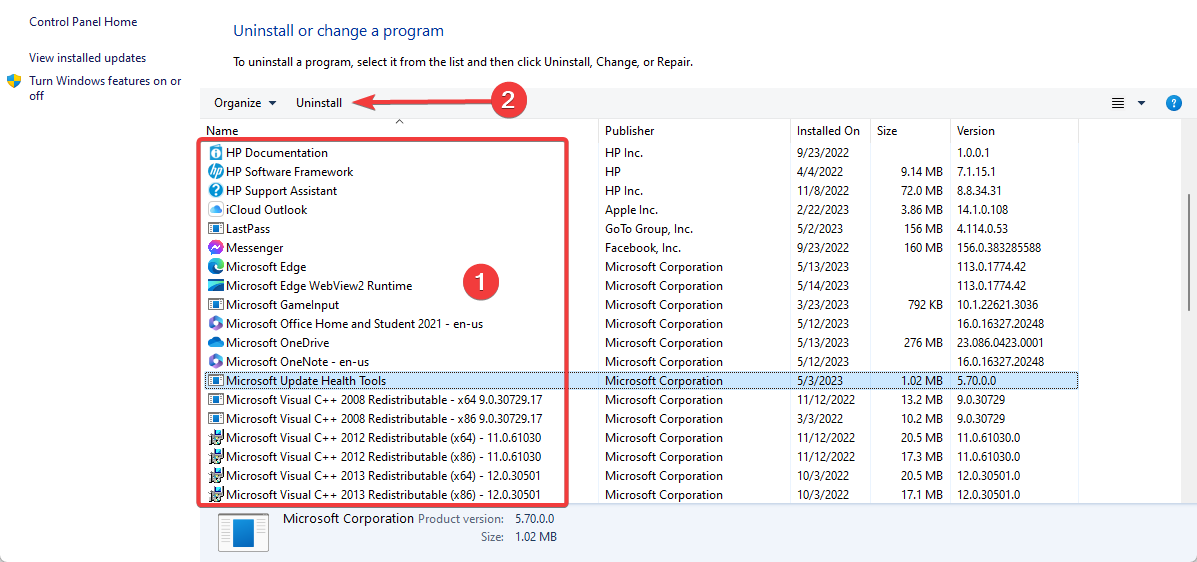
- Search for Java 6 Update 15 from the program list, click on it, and click the Uninstall button.
- Finally, follow the uninstall wizard to complete the uninstallation.
That is all you may need to know about the Java Update Scheduler. Now that you may have uninstalled it, to maintain security and compatibility with Java-based applications, it is crucial to regularly check for updates manually and ensure that you have installed the most recent version of Java.
Also, you may read our comprehensive guide to learn how to install Java on your Windows 11 devices.
That is all we cover in this guide. Let us know in the comment section if you would love to keep using Java without the updater.
Still having issues? Fix them with this tool:
SPONSORED
If the advices above haven't solved your issue, your PC may experience deeper Windows problems. We recommend downloading this PC Repair tool (rated Great on TrustPilot.com) to easily address them. After installation, simply click the Start Scan button and then press on Repair All.

